Wednesday, September 30, 2015
~ Mengalah Sementara Untuk Menang~
~ ALHAMDULILLAH ~
Sunday, September 13, 2015
~ HIBURKANLAH HATI ~
Wednesday, September 9, 2015
~ Kisah Suatu Hari ~
Sunday, September 6, 2015
Resepi Nasi Ayam
Assalamualaikum..
Hari ni sy nk share resepi nasi ayam. Daa 4,5 kali daa try.. Mmg menjadi.. Sngt2 mudah cepat ringkas. Dan yg penting sedapp.. Jd, utk memudahkn kerja, sy akn simpan resepi ini utk tatapan akan datang.
Dah mari salin resepi.. Masak nasi ayam untuk berbuka memang sesuai.. tak payah nak 3-4 macam lauk ;)
NASI AYAM
i) 3 pot beras (untuk keluarga kecilku)
ii) basuh beras bersih-bersih dan toskan
lemak dan kulit ayam (jangan buang.. basuh bersih dan guna untuk masak nasi)
i) 3 sudu majerin
(bahan tumbuk)
i) 3 ulas bawang merah
ii) 3 ulas bawang putih
iii) 1 inci halia
* on kan rice cooker anda.. bila dah panas, masukkan majerin.. tumis bahan tumbuk hingga perang.. masukkan lemak dan kulit ayam.. tumis sekali ya.. kemudian masukkan beras tadi dan kacau rata-rata hingga wangi.. membunuh ok bau dia time ni.. hahah.. kemudian masukkan sup dari rebusan ayam.. jangan banyak sangat air takut nasi menjadi lembik.. kurang tak pe.. Ok!! siap nasi ayam!!!! kalau sup tak cukup, pepandailah korang tambah air biasa ke apa.. hehehe
SUP
potongan ayam
(bahan tumbuk)
i) 4 biji bawang putih
ii) 2 biji bawang merah
iii) 2 inci halia
i) 1 kiub ayam
ii) daun sup
iii) daun bawang
iv) bawang goreng
*tak perlu tumis.. didihkan air.. lebur je ayam ngan bahan tumbuk tu.. campak kiub ayam.. masukkan garam.. bila ayam dah masak, tutup api.. keluarkan ayam dan toskan ayam.. sup tu bahagikan ye..separuh untuk masak nasi.. dan selebihnya untuk dimakan bersama nasi ayam.. campakkan daun sup, daun bawang dan bawang goreng sebagai hiasan ;)
AYAM
i) Bahan perap
ii) sos tiram
iii) kicap cair
iv) kicap manis
v) madu
vi) 3-4 titik minyak bijan
Lepas perap/lumurkan.. panaskan minyak.. dan goreng ayam.. tak perlu lama.. sebab ayam dah masak.. sampai nampak cantik je terus angkat.. potong-potong ayam macam kat stall nasi ayam :)
KUAH LADA
i) 4-5 lada hidup (merah)
ii) 1 biji bawang putih
iii) sedikit gula
iv) sedikit garam
v) 1/2 sudu kecil cuka
vi) 2 sudu makan cili sos
*blend kesemua bahan.. cili sos tak yah blend dulu pon takpe.. kemudian panaskan periuk.. tambah air dan cili sos (ikut tahap kepekatan masing-masing)
KUAH KICAP
*Guna balance perapan ayam tadi.. campurkan dengan kuah sup.. kalau cair.. tambah lagi kicap manis..
Senangkan? InsyaAllah walaupon simple je.. tapi rasa dia mengagumkan.. ok, disebabkan tu juadah untuk berbuka puasakan... rasa tak berapa best kalau menu itu je satu.. so aku buat cekodok bilis.. rangup-rangup makan dengan cili sos.. Acih sorang je hadap berapa ketul.. puas hati tengok semua orang suka ;) aku tak makan pon tak pe.. waaaahhh ibu mithali sangat ni.. hahahaha..
Sumber: .http://resepi-dan-cara-membuat-nasi-ayam.blogspot.my/?m=1
Thursday, June 11, 2015
~ fabric raya 2015 ~
Disini saya ada menjual dua warna (tone) kain sulam bandung coin yang murah. Ianya hanya rm70.00 sepasang include postage..
Saturday, March 7, 2015
Monday, March 2, 2015
~ RESEPI SUP IKAN MERAH~
RESEPI SUP KEPALA IKAN MERAH
- 2 belah kepala ikan merah
- 4 cawan air
- 1 bungkus sup bunjut
- minyak untuk menumis
- sedikit serbuk lada hitam
- Daun sup/daun bawang dan bawang goreng-utk taburan
- 1/2 inci halia
- 2 ulas bawang putih
- 3 biji bawang merah (tumbuk semua bahan hingga lumat)
- 1 btng kayu manis, 1 kntm bunga lawang, 2 biji buah pelaga
- 1 ulas bwng putih-hiris
- 2 biji bwng merah-hiris
- Panaskan minyak dan tumiskan bahan tumis.
- Masukkan bahan2 tumbuk tadi dan tumis sehingga bau wangi.
- Masukkan air, biarkan mendidih,masukkan ikan dan kacau rata.
- Tambah air lagi jika perlu. Masukkan garam dan perasakan. Letakan sedikit serbuk lada hitam.
- Sekiranya dah cukup rasa, matikan api dan angkat.
- Letak dlm mangkuk dan taburkan bwng goreng dan daun sup/bawang.
Wednesday, February 18, 2015
~ BORDER LACE RAYA 2015 ~
Disini saya ada dua warna (tone) border lace yang murah. Ianya hanya rm 10.00 per meter.
di sini saya lampirkan warna dan corak border lace yang masih dalam stock..! Grab it while u can! Boleh sms sy ke 0199554553 for more details. Tq.. (^_^)v
Untuk pembelian lebih dari 5meter, percuma 1 meter, dan termasuk untuk kos penghantaran. Cepat2.. Slagi stok masih ada..
BL002 (turqoise ) RM 10.00 per meter |
Wednesday, February 4, 2015
~ JAHITAN MANIK ~
Monday, February 2, 2015
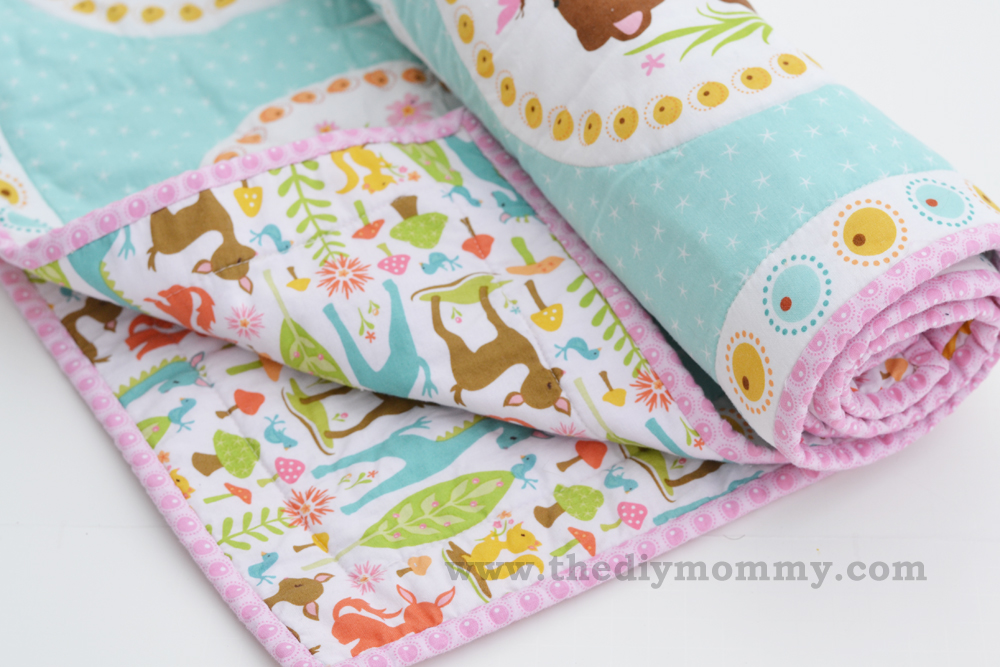
~ BABY QUILT ~
Materials:
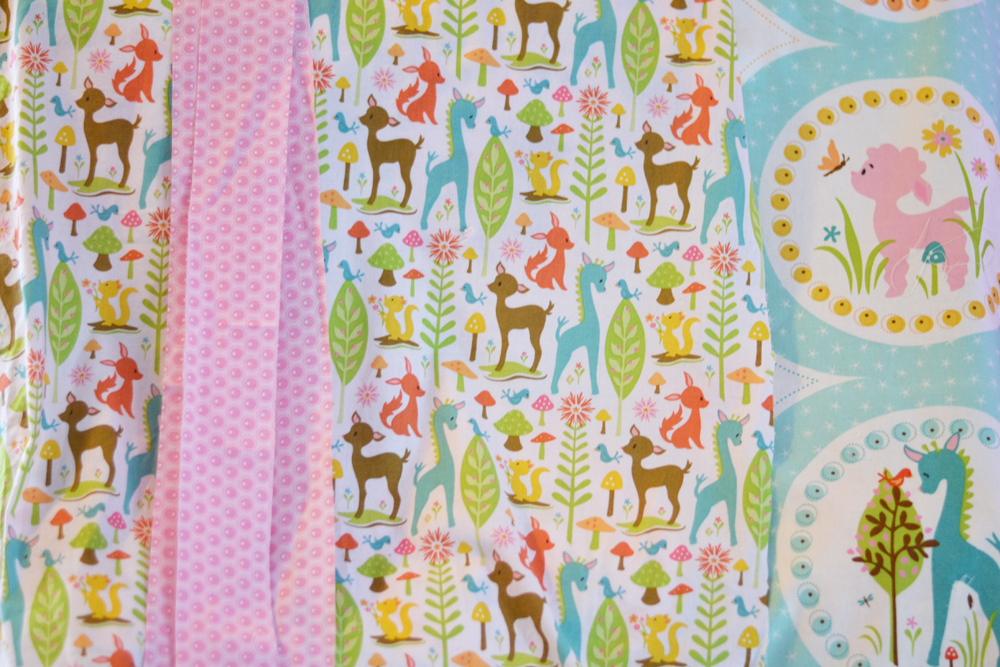
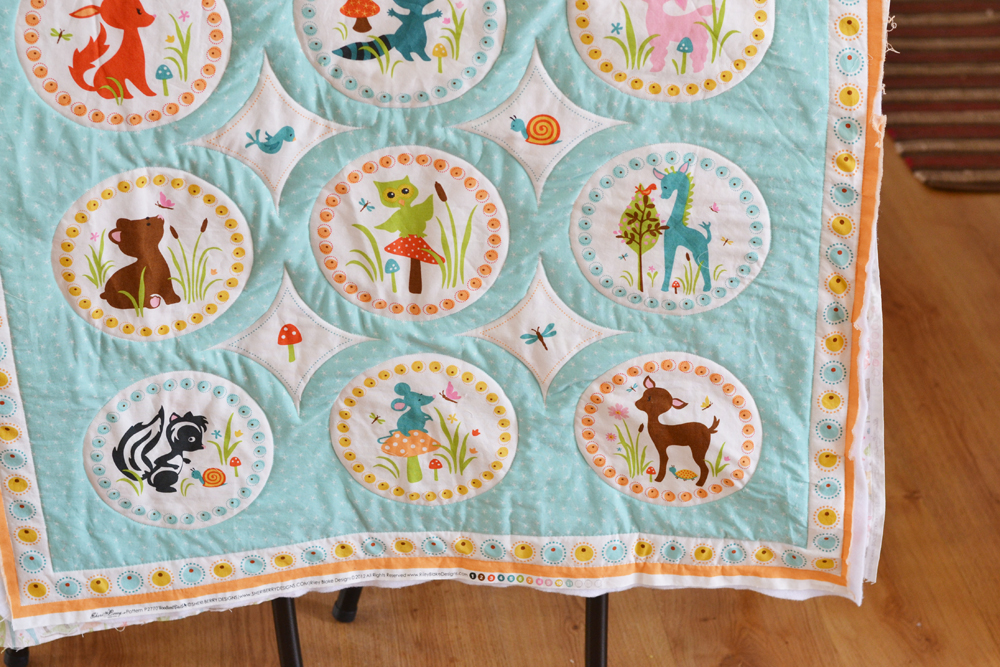
- baby quilt sized fabric panel (I used Woodland Trails Panel Blue from Fabric.com
)
- 1 1/2 yards of a coordinating fabric for the reverse side (I used Woodland Trails Deer Pink from Fabric.com)
- 1/2 yard coordinating fabric for quilt binding (I used Woodland Trails Dots Pink from Fabric.com)
- baby quilt sized piece of cotton/polyester quilt batting
- fabric adhesive spray
- pins
Directions:
Wash & dry all of your fabrics before beginning. Cut a piece of the reverse fabric to match the size of the front panel. Cut your binding fabric into 2 1/4″ wide strips that are as long as the fabric is wide (44″). You’ll need 3 of these strips if using the same panel I used. Otherwise, measure the perimeter of your fabric panel to see how many strips you need for the binding.
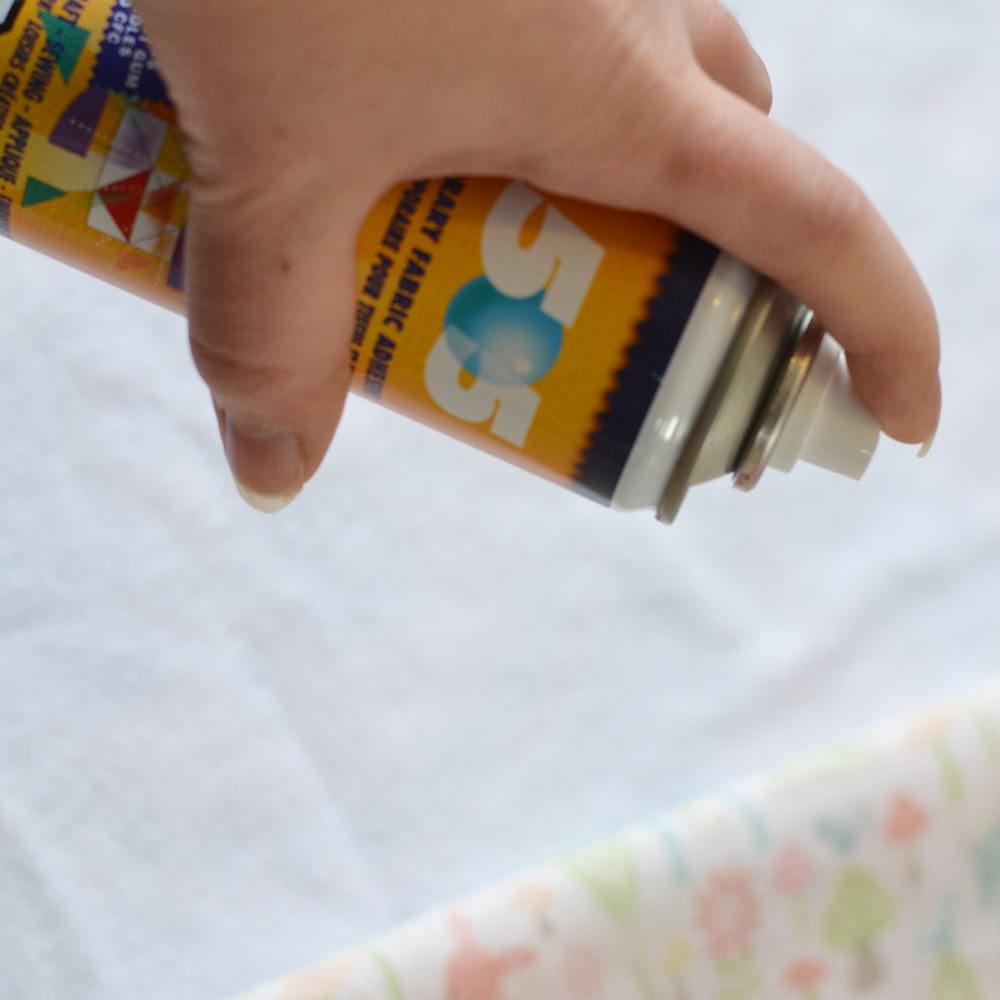
Someone on my Facebook page suggested that I use spray adhesive instead of pins to secure my quilt layers together and I thought that was a fabulous idea. Here’s how I did it…
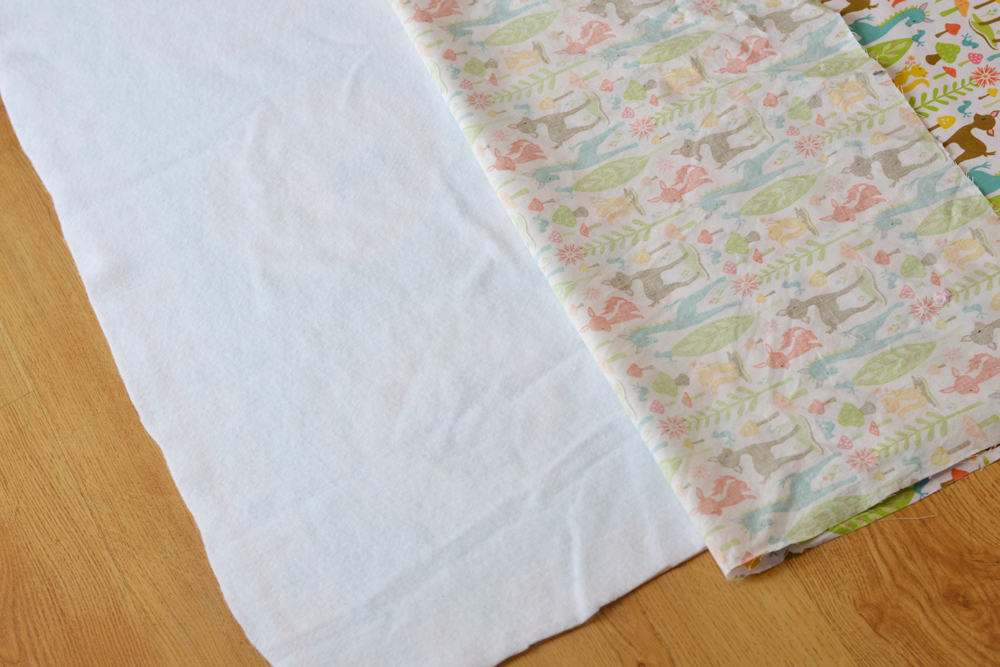
I started with the reverse side. I laid my piece of quilt batting on the floor, and then laid my reverse piece of fabric over it (right side up) and smoothed it out. I folded the bottom half up (as shown in the picture above) and sprayed the fabric adhesive spray as per it’s directions on to the quilt batting. Then, I unfolded the half of the reverse fabric and smoothed it back over the batting, patting it gently down. I repeated this process with the other half.
When the adhesive is dry, flip the quilt over and repeat this method with the front panel side (spraying the adhesive onto the batting layer). When the glue is dry you’re ready to start quilting!
The awesome thing about making a quilt with a fabric panel is that you don’t have to piece anything together – the work is done for you! Simply stitch through all of the layers where you think makes the most sense. Another bonus about this quilt? A baby size is a great size to start with on a standard machine – less fabric bulk to move around.
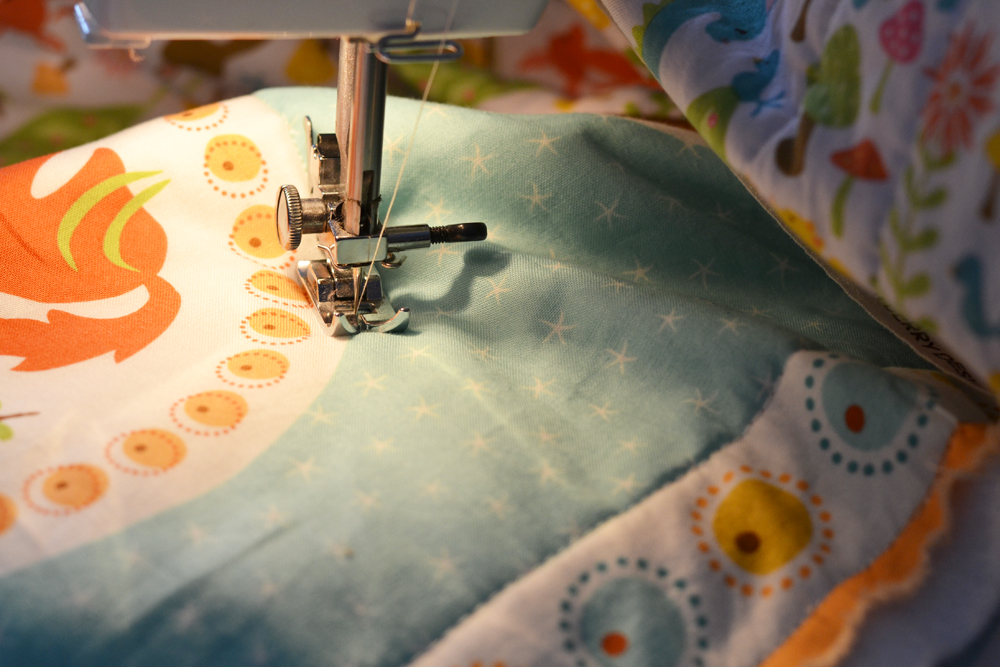
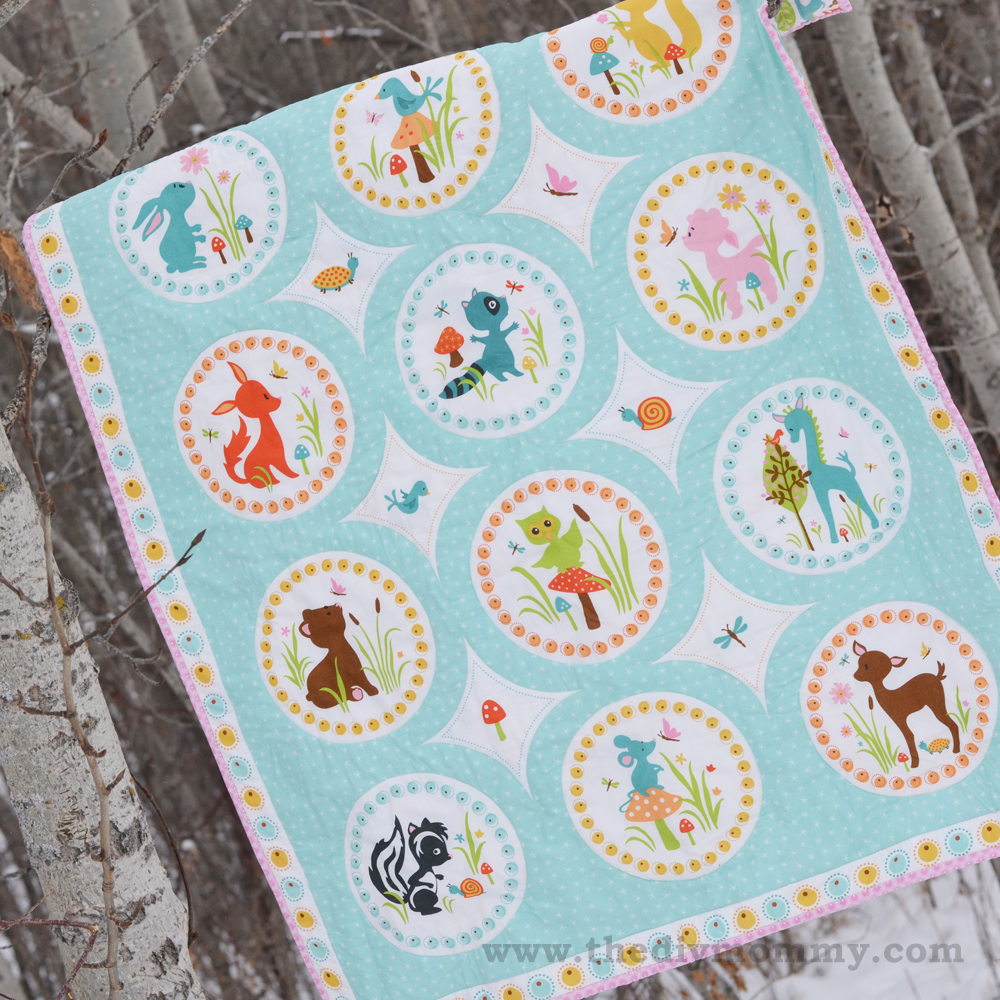
With this panel, I stitched around the large circles and the middle diamond shapes, and then on both sides of the outer border.
I found it helped to go slowly and keep my stitches on the smaller side. I held the fabric taught with my hands, but didn’t pull it too hard so that it wouldn’t stretch.
The hardest part for me was quilting the vertical sides. By the time I’d get 2/3 of the way down, my fabric had pulled a little and the square was skewed (fabric stretches more along this grain line). I ended up having to seam rip the two bottom sides and stitch them both again, going very slowly and carefully. I even had to make very miniscule tucks to make the piece square again because the fabric had stretched. I don’t notice them now that the quilt is done, but if anyone has any tips on how to prevent this happening I’d love to hear them in the comments! My only thought is that next time I’ll make sure there is more glue on the sides and I stitch at a slower pace.
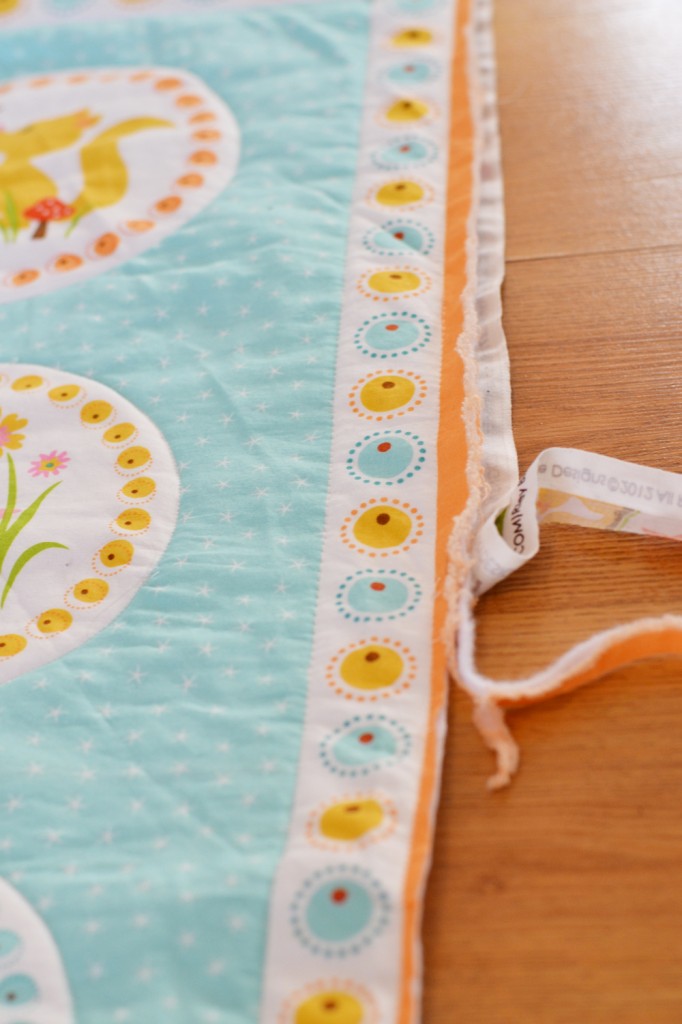
After you’re done quilting to your liking, Trim the sides of the quilt. I left a scant 1/8″ – 1/4″ of the orange border on this panel because I knew I wanted my pink binding to cover it completely.
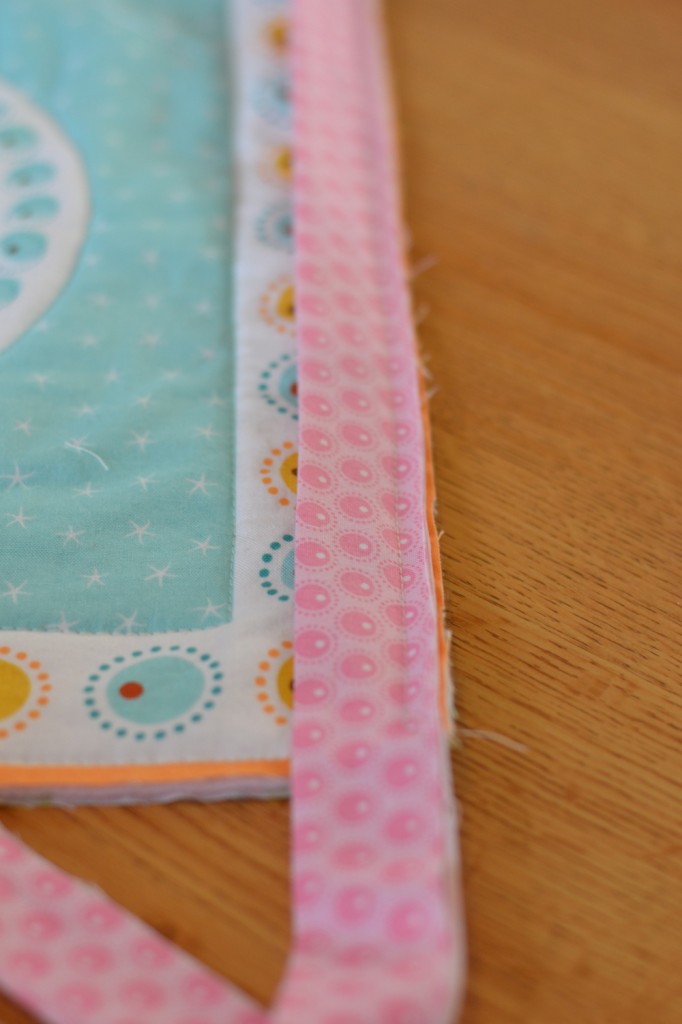
To make the binding, sew all of the binding strips together (wrong sides together with a 1/4″ seam). Fold the binding in half lengthwise and press.
Start sewing the binding to the quilt in the middle of a side. Line up the raw edge of the binding with the raw edge of the quilt, leave a couple of inches (you’ll use this to join the binding together at the end) and stitch using a 1/4″ seam allowance.
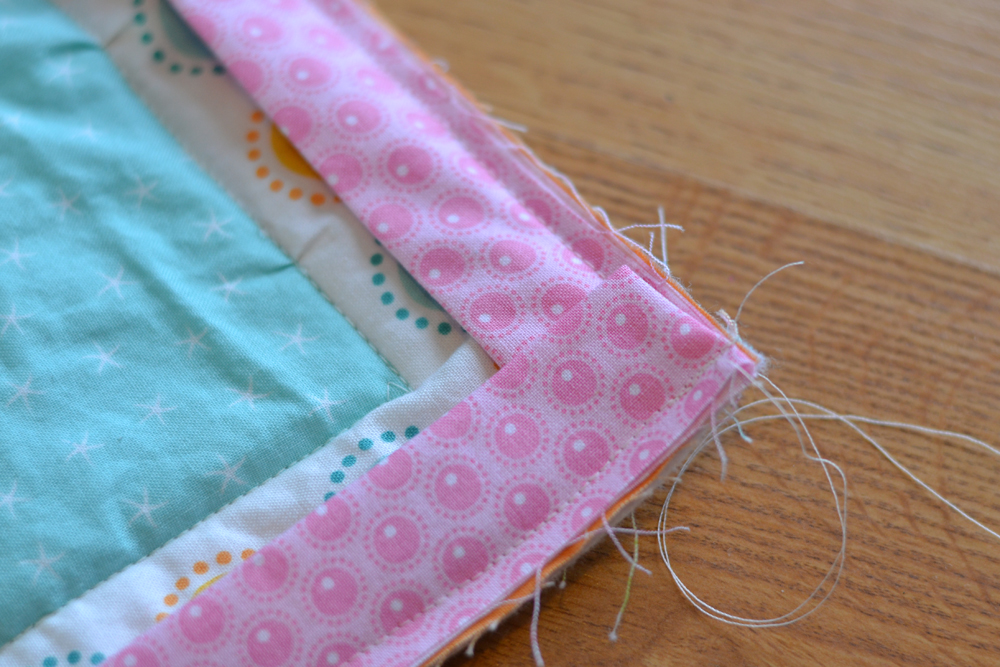
When you approach a corner, sew until you are 1/4″ from the edge. Backstitch and remove the needle. Fold the binding as shown above (there will be a triangle of folded binding underneath this fold) and then begin stitching again on the new side (as shown above). iCandy Handmade explains how to bind a quilt in wonderful detail if you need more help.
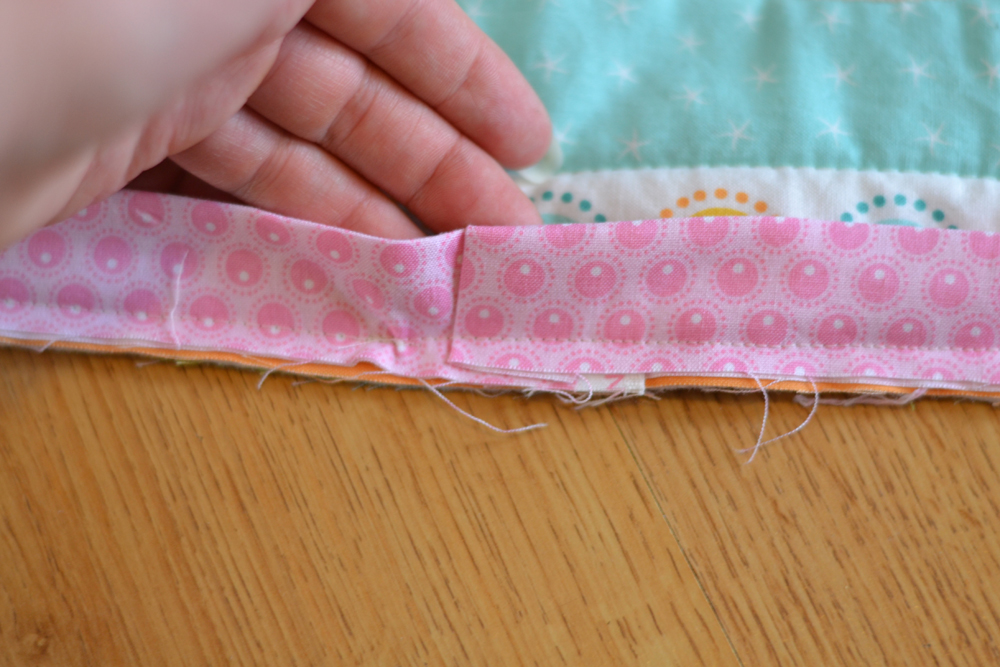
When you get to the end, stop sewing about an inch from where you began. Trim the binding so that it overlaps a couple of inches. Fold on end inward about 1/2″, and tuck the other end inside. Pin and sew to the quilt.
Now you’re almost done – there’s just some relaxing hand-stitching to go! This was honestly my favourite part because I could relax and watch TV at night while I stitched with my feet up. Ahhhh!
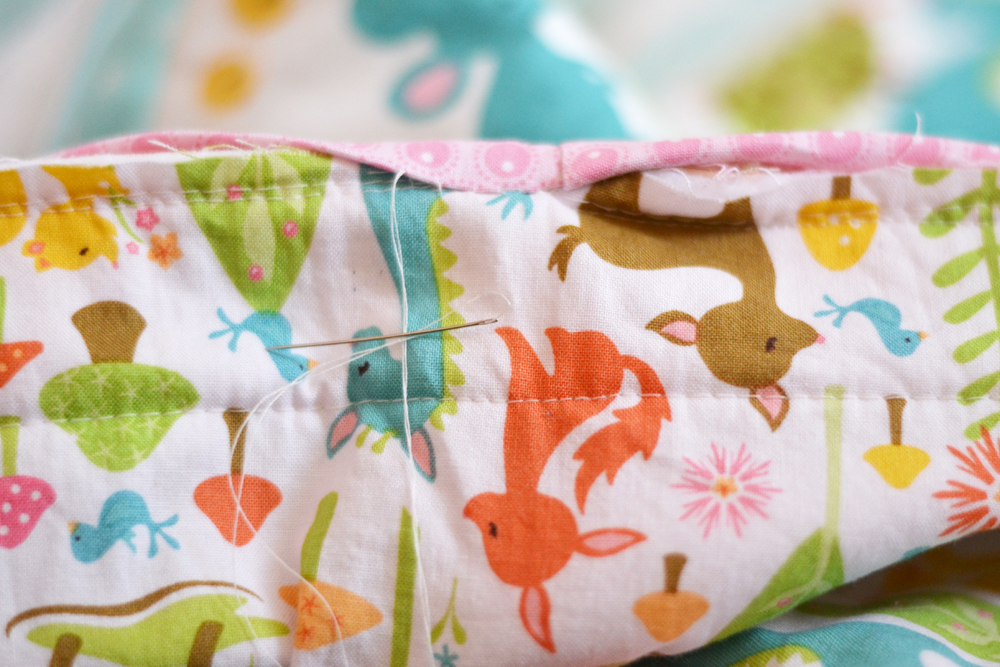
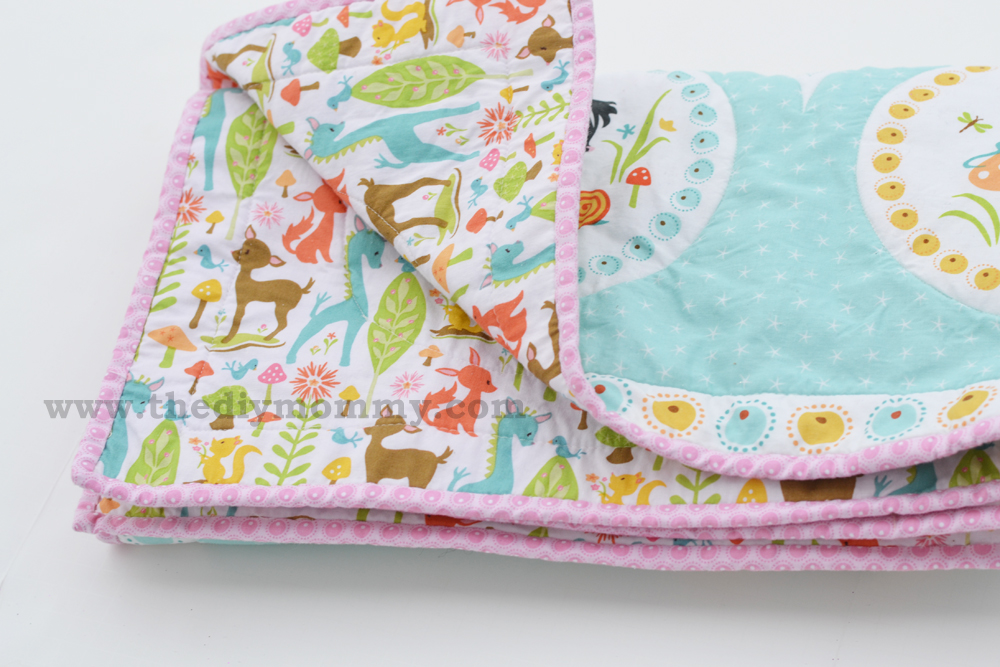
Turn the binding around the edge of the quilt to the back, and hand stitch it as above (it should cover the machine stitches you’ve made). Miter the corners as you go to make them nice and crisp (I hand stitched the mitered corners shut and also stitched the join of the binding shut).
After you’re done, you can wash the entire quilt as I did to give it that gorgeous handmade, puckery, quilty look.
Isn’t it so very sweet? I just love the finished quilt!
It’s a simple little quilt, but it’s pretty and fresh and it only took me a day to sew.
Reff: http://thediymommy.com/a-handmade-christmas-sew-an-easy-beginners-baby-quilt/
Sunday, February 1, 2015
~ BANTAL KEKABU ~
Wednesday, January 28, 2015
~ Kek Velvet Pelangi/Marble Kukus ~


Bahan-bahan ( loyang 9x6x3 / 8 inc )
- 4 biji telur - A yang sejuk dr petiais
- 3/4 cawan gula halus/perang (180g)
- 1 1/2 cawan tepung gandum (180g) - diayak
- 3/4 sk baking powder
- 1/2 sb penuh ovallete
- 1/4 sk garam
- 7 1/2 sb susu sejat (120g)
- 1 sk esen vanilla
- 1/3 cawan minyak jagung/mentega cair (80g)
- 3 atau 4 pewarna pilihan
- Panaskan kukusan.Loyang dialas kertas dan digris.
- Satukan kesemua bahan2 ke dalam mangkuk mixer kecuali minyak dan pewarna dan pukul hingga kembang.
- Masukkan minyak dan kacau perlahan2 hingga adunan sebati.
- Bahagi adunan kepada beberapa bahagian dan warnakan dengan warna2 pilihan.
- Bubuh adunan berselang-seli warna ke dalam loyang hingga habis.
- Tutup loyang dengan alum. foil yg digris dan kukus selama 45 min. atau hingga kek masak.
- Buka segera alum.foil tadi dan biar kek di dalam loyang 5-10 min dan terbalikkan atas redai kek untuk disejukkan.
- Setelah sejuk,potong dan hidangkan.
~ KEK COKLAT KUKUS ~
KEK COKLAT KUKUS
Bahan-bahan:
Bhn A
- 1 cawan serbuk koko
- 1 cawan susu cair
- 1 cawan susu pekat
- 1 cawan minyak masak
- 1 cawan gula
Bhn B
- 1 1/4 cawan tepung gandum
- 1 sudu kecil baking powder
- 1 sudu kecil soda bikarbonat
Bhn C
3 biji telur - blend guna blender
Cara-cara:
- Campurkan kesemua bahan A dalam periuk. Panaskan sebentar atas api dan kacau hingga sebati
- Masukkan bahan B dan C ke dalam bahan A. Gaul sebati
- Panaskan kukusan hingga air mendidih
- Masukkan adunan ke dalam loyang atau bekas plastik tahan panas ikut citarasa anda.
- Kukus selama 1 jam. Pastikan penutup kukusan di bungkus dengan kain supaya air tidak menitik ke atas kek.
- Bila dah sejuk, boleh disiram coklat cair dan ditabur coklat urai.
RESEPI COKLAT CAIR
Bahan-bahan:
- 1/2 cawan serbuk koko
- 1 sudu besar minyak
- 1 cawan susu cair
- 1 cawan susu pekat
cara-cara:
- Campurkan kesemuanya dan panaskan atas api perlahan sambil mengacau hingga sebati dan likat
selamat mencuba.


