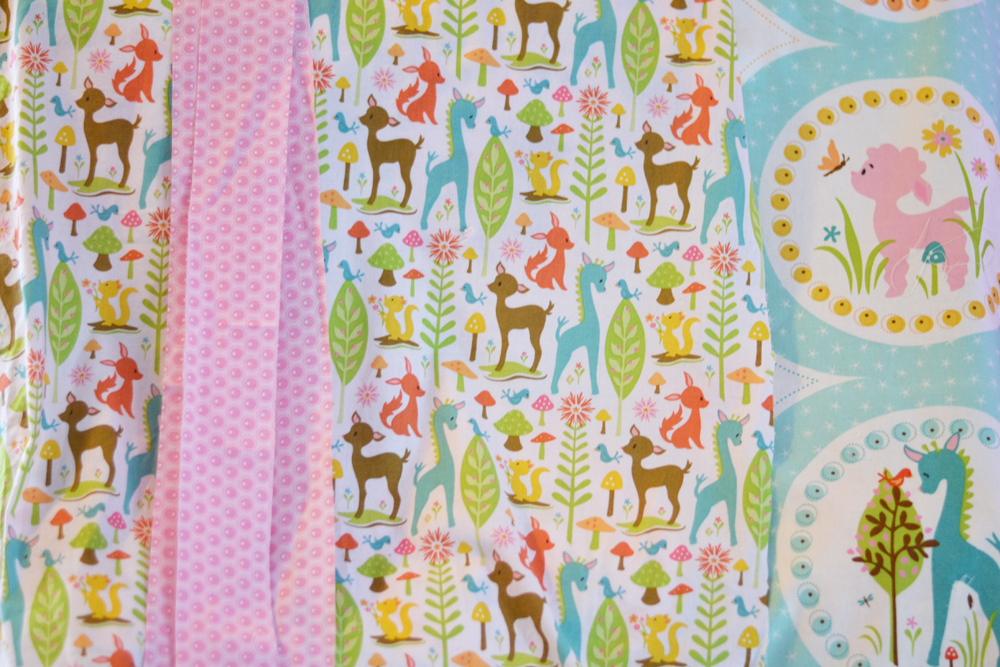
Monday, February 2, 2015

~ BABY QUILT ~

Quilts are so beautiful. I’ve always admired people that can make gorgeous quilts with intricate piecing and meticulous machine-work.

Materials:

Directions:

Sew and Easy Beginner's Baby Quilt by The DIY Mommy

Wash & dry all of your fabrics before beginning. Cut a piece of the reverse fabric to match the size of the front panel. Cut your binding fabric into 2 1/4″ wide strips that are as long as the fabric is wide (44″). You’ll need 3 of these strips if using the same panel I used. Otherwise, measure the perimeter of your fabric panel to see how many strips you need for the binding.
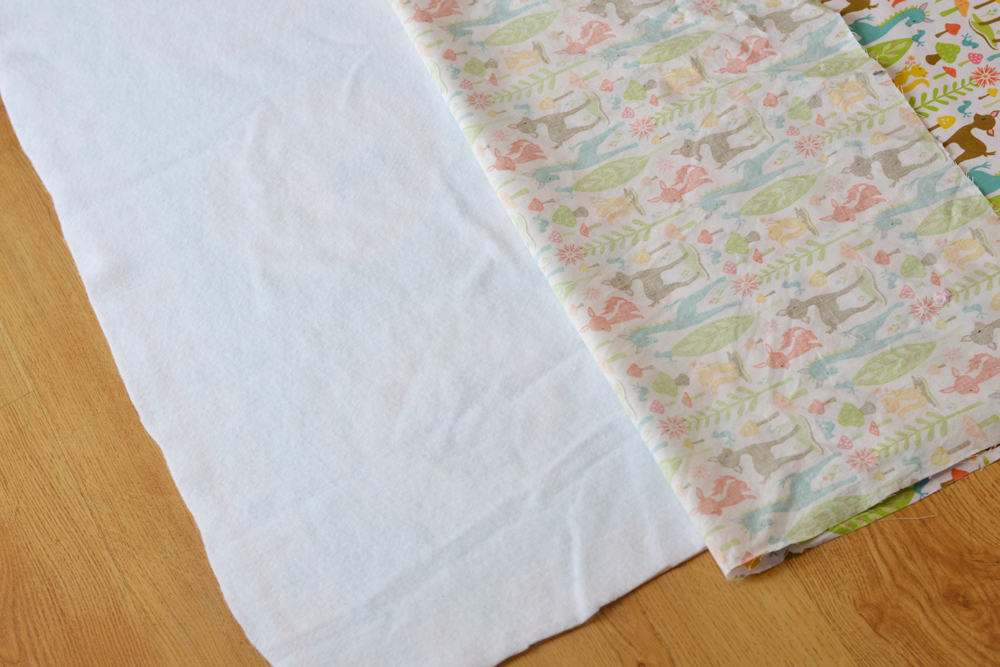
Sew an Easy Beginner's Baby Quilt by The DIY Mommy

Someone on my Facebook page suggested that I use spray adhesive instead of pins to secure my quilt layers together and I thought that was a fabulous idea. Here’s how I did it…

I started with the reverse side. I laid my piece of quilt batting on the floor, and then laid my reverse piece of fabric over it (right side up) and smoothed it out. I folded the bottom half up (as shown in the picture above) and sprayed the fabric adhesive spray as per it’s directions on to the quilt batting. Then, I unfolded the half of the reverse fabric and smoothed it back over the batting, patting it gently down. I repeated this process with the other half.
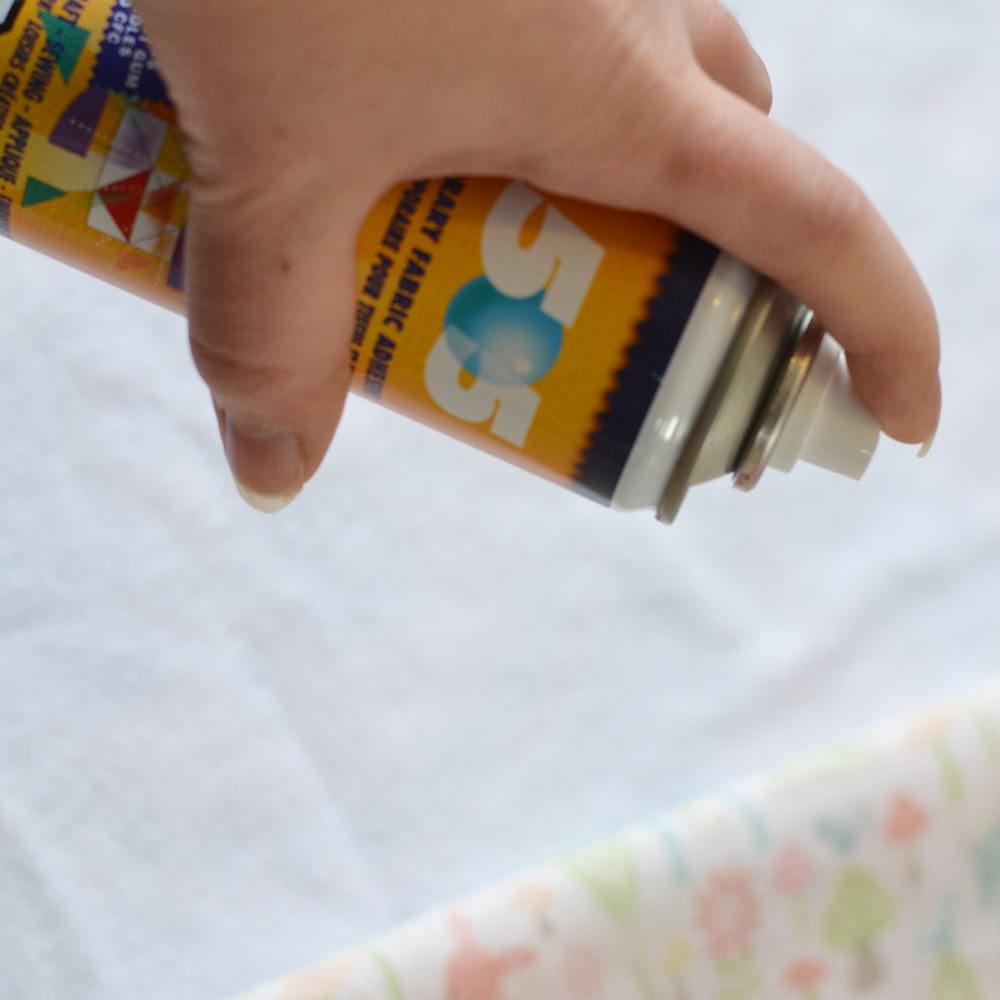
Sew an Easy Beginner's Baby Quilt by The DIY Mommy

When the adhesive is dry, flip the quilt over and repeat this method with the front panel side (spraying the adhesive onto the batting layer). When the glue is dry you’re ready to start quilting!
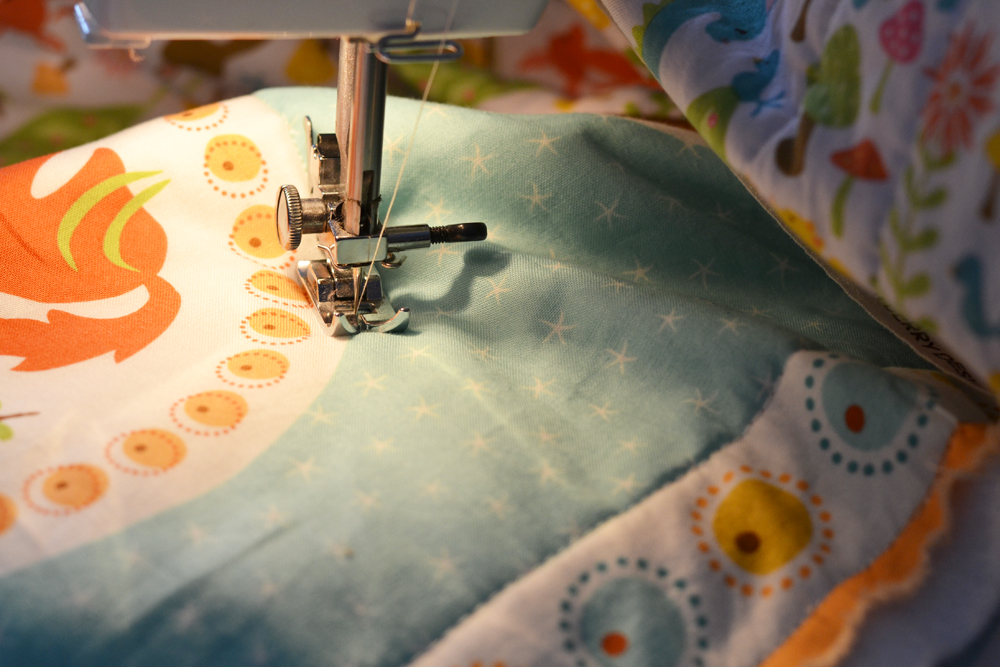
Sew an Easy Beginner's Baby Quilt by The DIY Mommy

The awesome thing about making a quilt with a fabric panel is that you don’t have to piece anything together – the work is done for you! Simply stitch through all of the layers where you think makes the most sense. Another bonus about this quilt? A baby size is a great size to start with on a standard machine – less fabric bulk to move around.

With this panel, I stitched around the large circles and the middle diamond shapes, and then on both sides of the outer border.

I found it helped to go slowly and keep my stitches on the smaller side. I held the fabric taught with my hands, but didn’t pull it too hard so that it wouldn’t stretch.
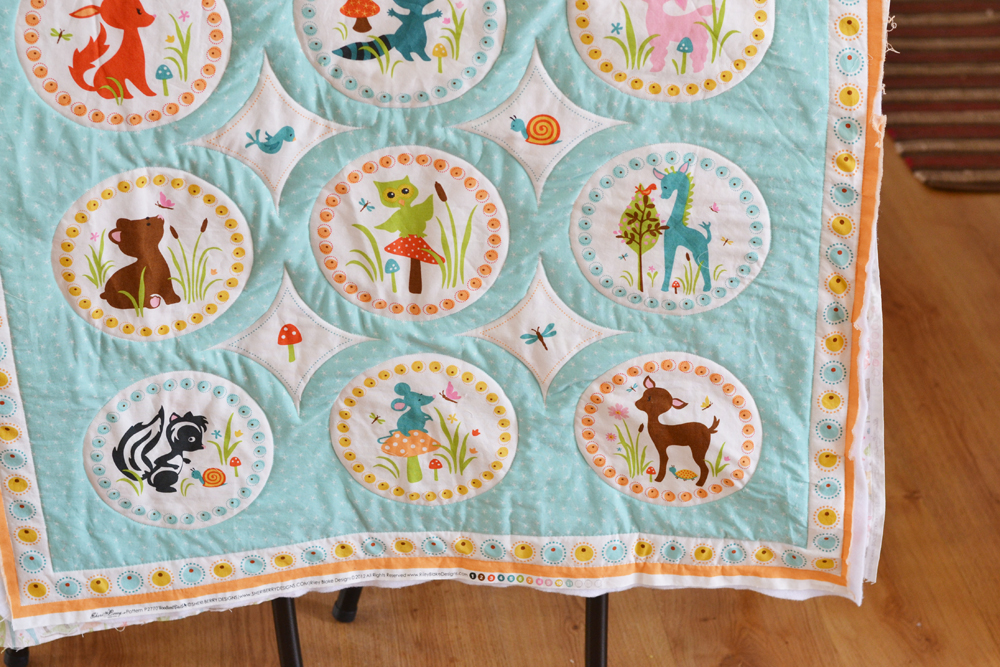
Sew an Easy Beginner's Baby Quilt by The DIY Mommy

The hardest part for me was quilting the vertical sides. By the time I’d get 2/3 of the way down, my fabric had pulled a little and the square was skewed (fabric stretches more along this grain line). I ended up having to seam rip the two bottom sides and stitch them both again, going very slowly and carefully. I even had to make very miniscule tucks to make the piece square again because the fabric had stretched. I don’t notice them now that the quilt is done, but if anyone has any tips on how to prevent this happening I’d love to hear them in the comments! My only thought is that next time I’ll make sure there is more glue on the sides and I stitch at a slower pace.
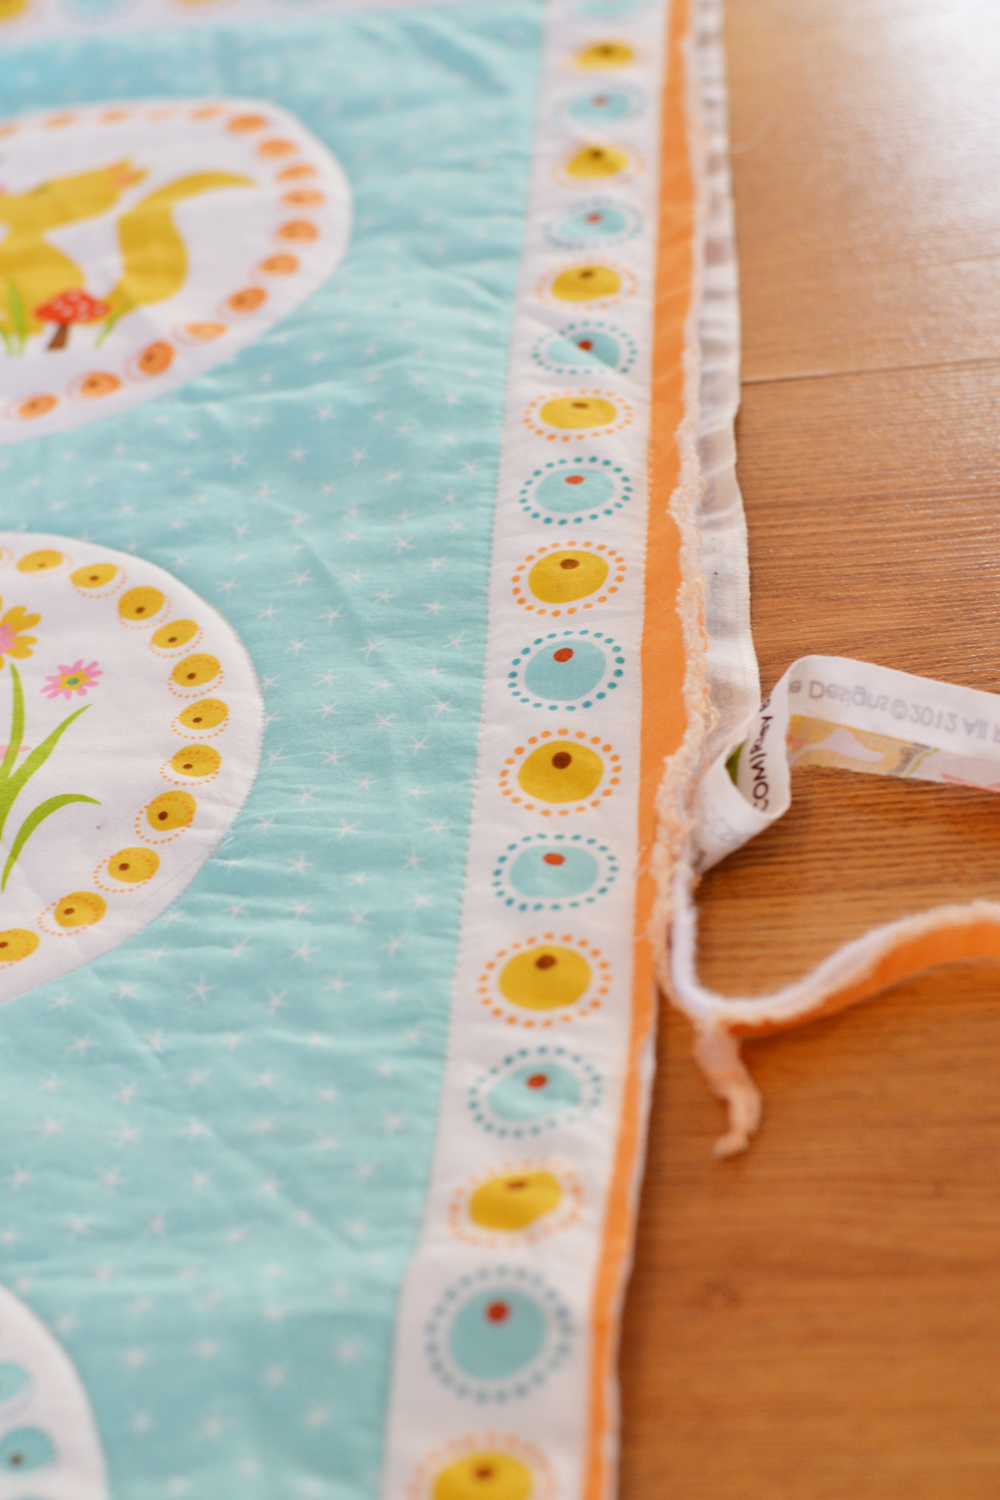
Sew an Easy Beginner's Baby Quilt by The DIY Mommy

After you’re done quilting to your liking, Trim the sides of the quilt. I left a scant 1/8″ – 1/4″ of the orange border on this panel because I knew I wanted my pink binding to cover it completely.

To make the binding, sew all of the binding strips together (wrong sides together with a 1/4″ seam). Fold the binding in half lengthwise and press.
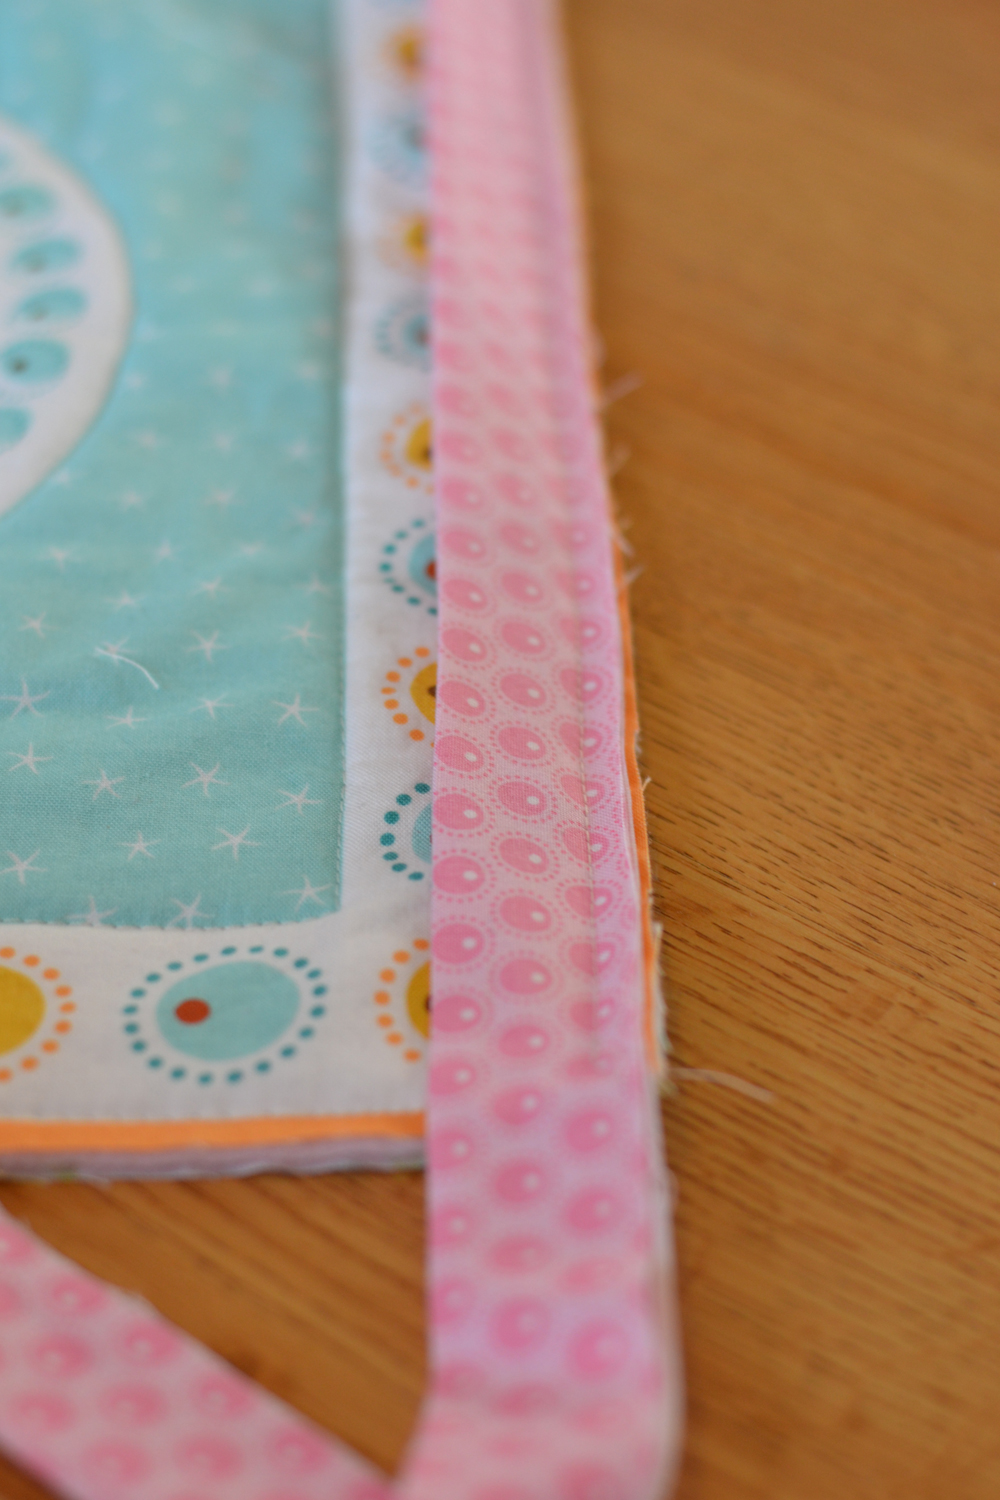
Sew an Easy Beginner's Baby Quilt by The DIY Mommy

Start sewing the binding to the quilt in the middle of a side. Line up the raw edge of the binding with the raw edge of the quilt, leave a couple of inches (you’ll use this to join the binding together at the end) and stitch using a 1/4″ seam allowance.
Sew an Easy Beginner's Baby Quilt by The DIY Mommy

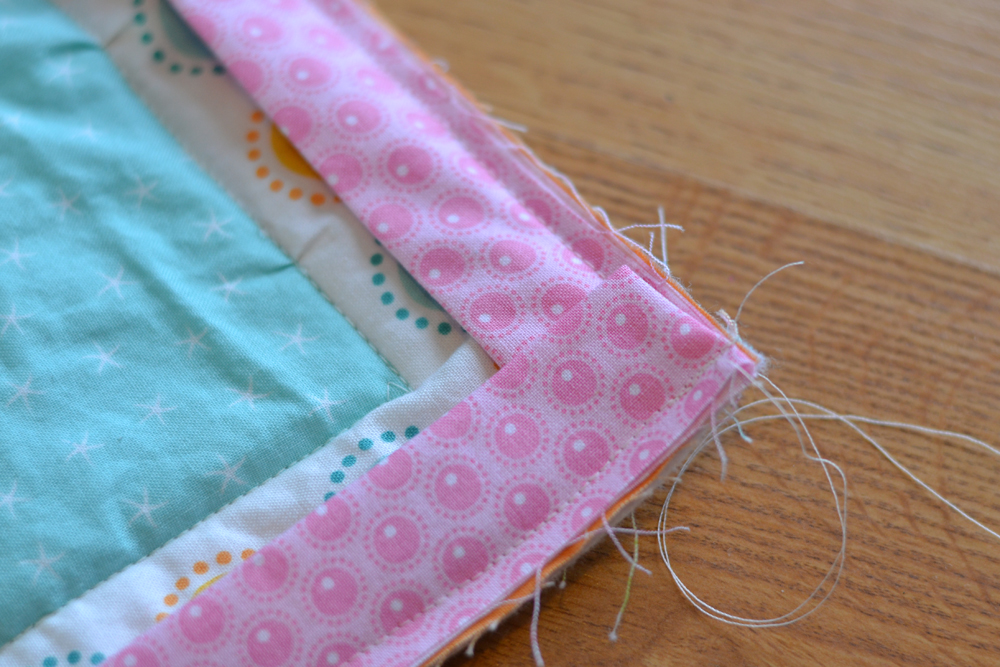
When you approach a corner, sew until you are 1/4″ from the edge. Backstitch and remove the needle. Fold the binding as shown above (there will be a triangle of folded binding underneath this fold) and then begin stitching again on the new side (as shown above). iCandy Handmade explains how to bind a quilt in wonderful detail if you need more help.
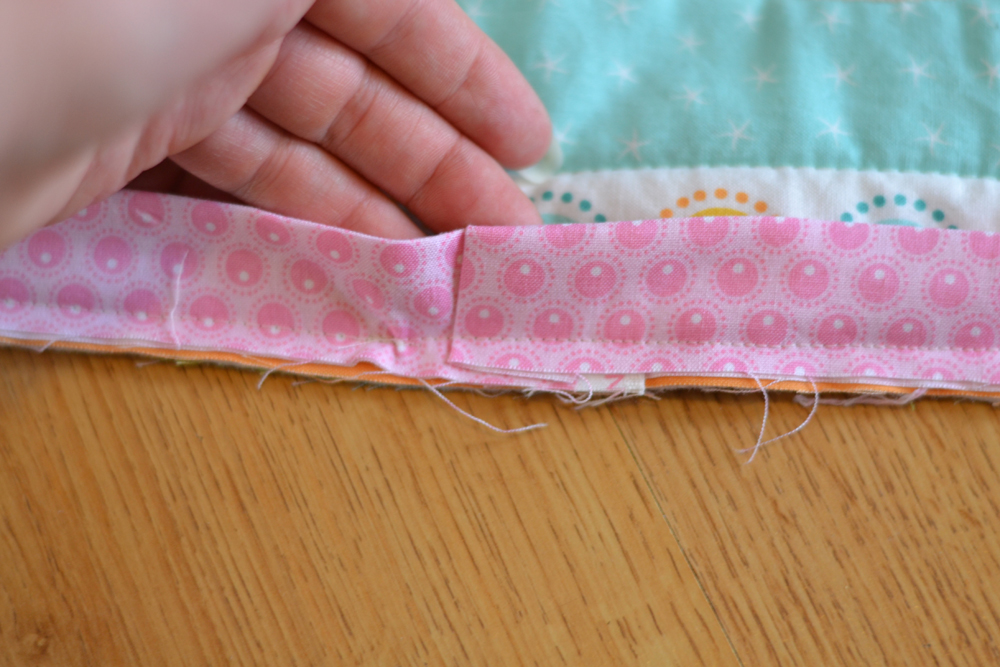
Sew an Easy Beginner's Baby Quilt by The DIY Mommy

When you get to the end, stop sewing about an inch from where you began. Trim the binding so that it overlaps a couple of inches. Fold on end inward about 1/2″, and tuck the other end inside. Pin and sew to the quilt.
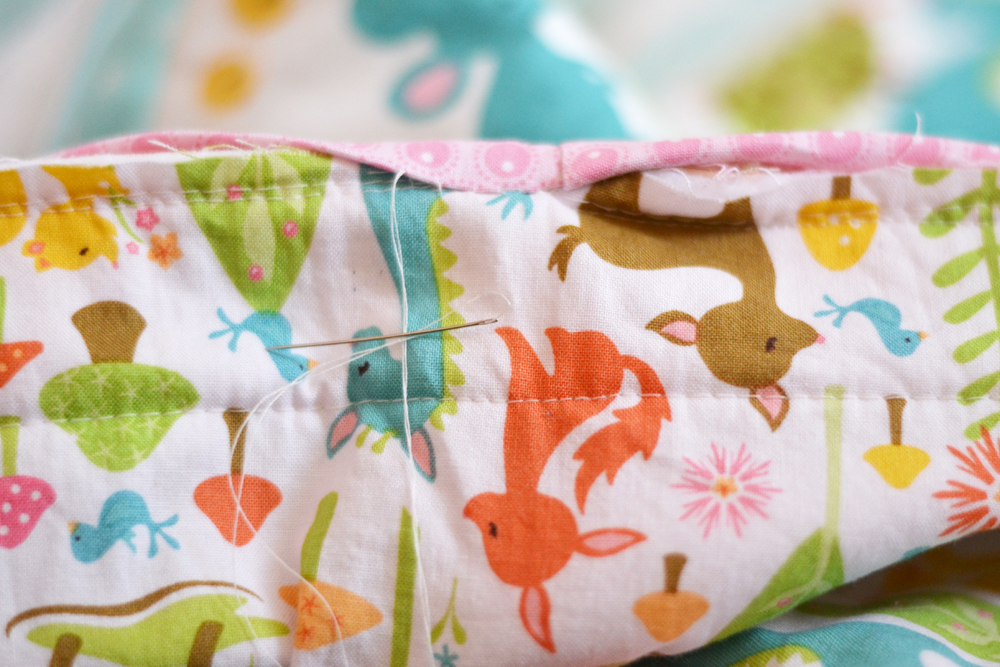
Sew an Easy Beginner's Baby Quilt by The DIY Mommy

Now you’re almost done – there’s just some relaxing hand-stitching to go! This was honestly my favourite part because I could relax and watch TV at night while I stitched with my feet up. Ahhhh!

Turn the binding around the edge of the quilt to the back, and hand stitch it as above (it should cover the machine stitches you’ve made). Miter the corners as you go to make them nice and crisp (I hand stitched the mitered corners shut and also stitched the join of the binding shut).
Sew an Easy Beginner's Baby Quilt by The DIY Mommy

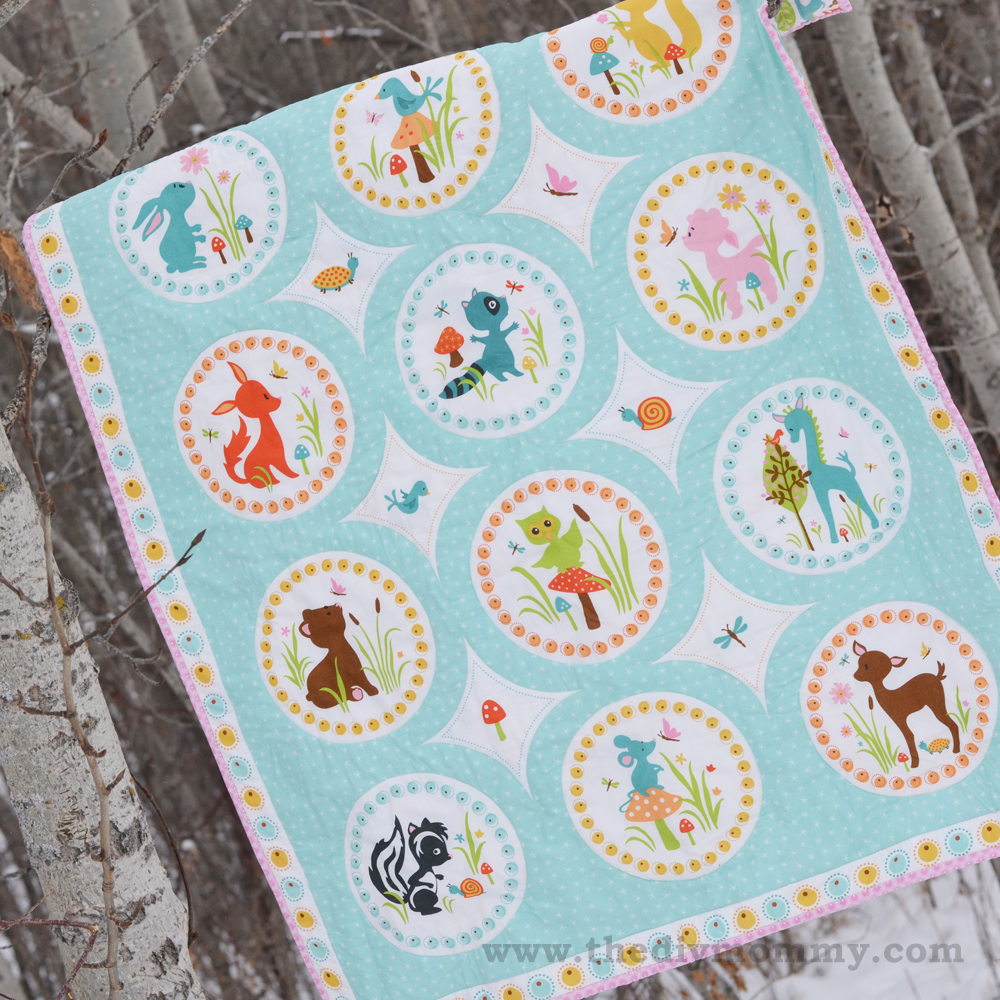
After you’re done, you can wash the entire quilt as I did to give it that gorgeous handmade, puckery, quilty look.

Isn’t it so very sweet? I just love the finished quilt!
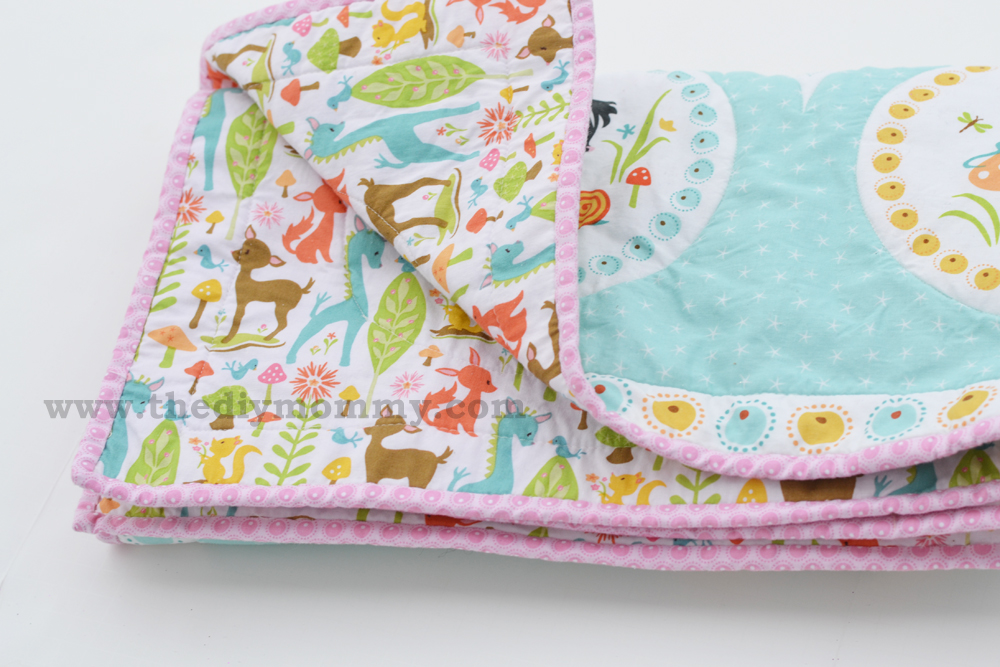
Sew an Easy Beginner's Baby Quilt by The DIY Mommy

It’s a simple little quilt, but it’s pretty and fresh and it only took me a day to sew.
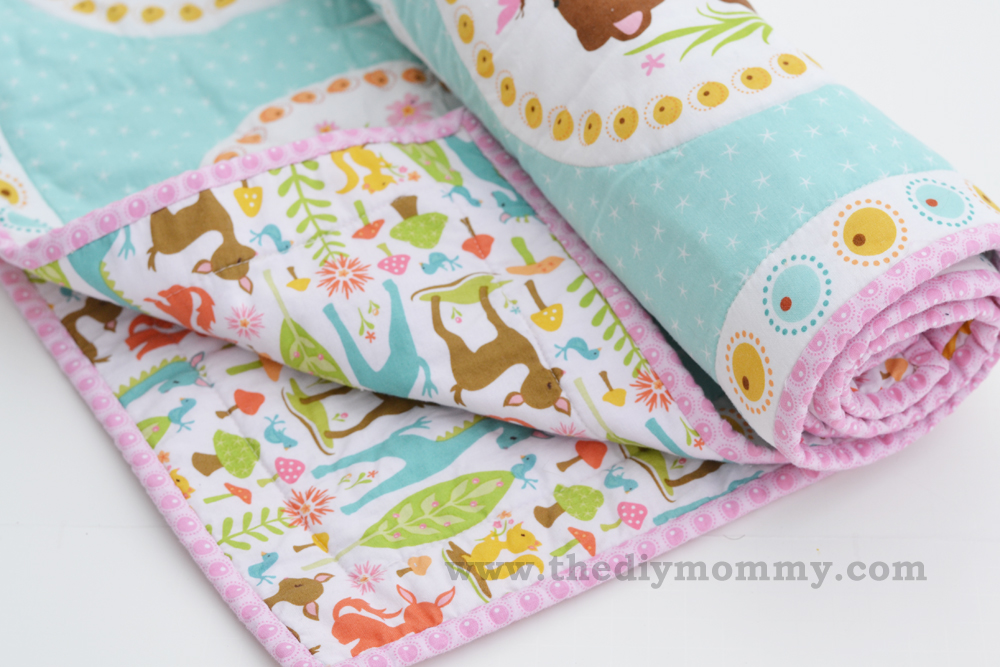
Sew an Easy Beginner's Baby Quilt by The DIY Mommy

Reff: http://thediymommy.com/a-handmade-christmas-sew-an-easy-beginners-baby-quilt/

Sunday, February 1, 2015

~ BANTAL KEKABU ~

Assalamualaikum.. 
Hari ni alhamdulillah belajar kumpul maklumat sikit2 sebelum membuat percubaan menjahit bantal kekabu. Cuaca pun cerah jadi boleh mula untuk menjahit bantal kekabu..
Jom boleh ikuti step2 dia. Mudah dan senang. 

Siapkan dahulu sarung kekabu sebelum membuat sarung bantal. Guna mana2 kain cotton yg mudah dan senang. 

Mampatkan kekabu guna batang kayu dan pukul2 sampai kekabu mampat. Sehingga bantal jadi ala2 roti kembang gituuu.. Hehehee2.. 


Aktiviti mengeringkan kekabu sebelum dimasukkan ke dalam sarung kekabu. 


Bantal kekabu sarung karipap..


Bantal kekabu sarung poket 

Alhamdulillah, dh siap dua biji bantal kekabu. Lepas ni boleh cuba buat tilam kekabu bayi dgn bantal sisi serta kepala. Tggu post akan datang. Insyaallah.. 

Wednesday, January 28, 2015

~ Kek Velvet Pelangi/Marble Kukus ~


Bahan-bahan ( loyang 9x6x3 / 8 inc )
  • 4 biji telur - A yang sejuk dr petiais
  • 3/4 cawan gula halus/perang (180g)
  • 1 1/2 cawan tepung gandum (180g) - diayak
  • 3/4 sk baking powder
  • 1/2 sb penuh ovallete
  • 1/4 sk garam
  • 7 1/2 sb susu sejat (120g)
  • 1 sk esen vanilla
  • 1/3 cawan minyak jagung/mentega cair (80g)
  • 3 atau 4 pewarna pilihan
Cara-cara
  1. Panaskan kukusan.Loyang dialas kertas dan digris.
  2. Satukan kesemua bahan2 ke dalam mangkuk mixer kecuali minyak dan pewarna dan pukul hingga kembang.
  3. Masukkan minyak dan kacau perlahan2 hingga adunan sebati.
  4. Bahagi adunan kepada beberapa bahagian dan warnakan dengan warna2 pilihan.
  5. Bubuh adunan berselang-seli warna ke dalam loyang hingga habis.
  6. Tutup loyang dengan alum. foil yg digris dan kukus selama 45 min. atau hingga kek masak.
  7. Buka segera alum.foil tadi dan biar kek di dalam loyang 5-10 min dan terbalikkan atas redai kek untuk disejukkan.
  8. Setelah sejuk,potong dan hidangkan.

Rujukan: http://yatiememories.blogspot.com/2012/06/kek-velvet-pelangimarble-kukus.html?m=1

~ KEK COKLAT KUKUS ~


DSC01495


KEK COKLAT KUKUS

Bahan-bahan: 

Bhn A

  • 1 cawan serbuk koko 
  • 1 cawan susu cair 
  • 1 cawan susu pekat 
  • 1 cawan minyak masak 
  • 1 cawan gula

Bhn B

  • 1 1/4 cawan tepung gandum 
  • 1 sudu kecil baking powder 
  • 1 sudu kecil soda bikarbonat

Bhn C

3 biji telur - blend guna blender 

Cara-cara:

  1. Campurkan kesemua bahan A dalam periuk. Panaskan sebentar atas api dan kacau hingga sebati 
  2. Masukkan bahan B dan C ke dalam bahan A. Gaul sebati 
  3. Panaskan kukusan hingga air mendidih 
  4. Masukkan adunan ke dalam loyang atau bekas plastik tahan panas ikut citarasa anda. 
  5. Kukus selama  1 jam. Pastikan penutup kukusan di bungkus dengan kain supaya air tidak menitik ke atas kek. 
  6. Bila dah sejuk, boleh disiram coklat cair dan ditabur coklat urai.


  DSC00951

DSC00966

DSC00980


RESEPI COKLAT CAIR

Bahan-bahan:

  • 1/2 cawan serbuk koko 
  • 1 sudu besar minyak 
  • 1 cawan susu cair 
  • 1 cawan susu pekat

cara-cara:

  1. Campurkan kesemuanya dan panaskan atas api perlahan sambil mengacau hingga sebati dan likat


DSC00967

DSC00983

DSC01476

DSC01482

selamat mencuba.

~ DIY BANTAL SEGI ~


A simple envelope pillow was the first sewing project I ever did (unless you count those jam shorts in middle school).

It's a perfect beginner project if you're looking to learn how to sew and the pillow can easily be taken in and out so you can change things up whenever you'd like. The process couldn't be simpler and it's a great addition to any room

SUPPLIES:

  • favorite fabric (I'd use a cotton for a beginner, it's easier to work with)
  • stuff pillow
  • scissors
  • matching thread
  • iron
  • sewing machine


You'll need to cut three pieces of fabric. First measure your pillow. Mine was 13 x 13 inches. So I cut one that was 2 inches longer on each side 15 x 15. Then I cut two smaller pieces that will be the envelope. You want them the same height but shorter width by about 5 inches. So I cut two pieces of 15 x 10.

Lay down the large pieces on the bottom and then layer the two other pieces on top. This is just to get a sense of what it will look like. Trim any edges so that the four sides of the square are pretty matched up.


On each of the smaller envelope pieces you'll create a nice finished seam on one of the longer sides. Iron down about 1/2 an inch and pin. Remember you're only creating a finished seam on ONE long side for each piece. Sew along that seam.


After the finished seam are done you'll lay down the larger piece, right side facing up. Then place one of the smaller pieces on top, right side down. Place the last small piece on top of that right side down.


Now you'll pin along all four sides. The middle flaps are left open to get the pillow insert in and out. Sew 5/8ths of an inch around the perimeter where you've pinned.


Turn it right side out and it should look like this!

Now you just have to stuff your pillow inside the envelope and you're done!

Read more:  DIY: Simple Envelope Pillow - Momtastic http://www.momtastic.com/diy/168123-diy-simple-envelope-pillow/#ixzz3Q5pC4XOb 
Follow us: @itsmomtastic on Twitter | itsmomtastic on Facebook

Tuesday, January 20, 2015

~ INTI KENTANG KARIPAP ~

Alhamdulillah, pagi ni dah siap sedia karipap inti kentang.. Mmg kentang semata2.. Hehehe2.. Lesson no 2 for pastry. Hehe2.. 


Bahan-bahan inti
3 biji kentang *dibuang kulit dan dipotong dadu
1 ulas bawang merah
3 ulas bawang putih
Serbuk kari daging *bancuh dgn air
Air *guna ikut kesesuaian 
Garam
Serbuk perasa 
Daun kari 

Cara-cara untuk membuat inti
1. Tumbuk bawang merah + bawang putih  hinggakesemuanya lumat.
2. Panaskan minyak. Bila minyak dah panas, masukkan bawang yang telah di tumbuk.Goreng hingga kekuningan & naik bau. 
3. Kacau seketika dan masukkan kentang + bancuhan serbuk kari + air. (air guna untuk melembutkan kentang. kalau air dah kering dan kentang belum lembut boleh tambah air lagi)
3. Masukkan garam. Boleh masukkan serbuk perasa jika anda suka.
4.Biar sehingga kering dan tutup api.


** dah diambil untuk karipap.. 😁  

Dan hasilnya....


Ni lah karipap utk suami.. Mkn2 punya mkn, si isteri mesti kne mintak pendapat, pandangan.. Kot2 ade terkurang. Amik positif.. Nnt mne tau kita cuba lg mungkin lagi sedap dn boleh buka tempahan.. Kn.. Kn.. 😁😆

Komen:
1) kari kurang menyengat (mungkin salah guna jenama rempah kot)
2) cm tebal je tgk kulit. First time buat, mesti fikir.."cepat abis uli, cepat abis uli" hehehee2.. 

Sekian, tq.. Kita jumpa lg selepas ini utk resepi seterusnya.. Xtau lg.. Hehehee2.. Assalamualaikum wbt...😊

Rujukan:
http://quraistory.blogspot.com/2014/04/resipi-karipap-kentang-mudah-dan-sedap.html?m=1


Wednesday, January 14, 2015

~ KARIPAP PUSING ~

KARIPAP PUSING AKA PUTAR


Bhn utk doh:
Doh A

2 cwn tepung gandum
1/4 cwn air ( bole tambah jika  kurang)
sedikit garam

Doh B:

2 cwn tepung gandum
1/2 cwn margerine

Cara membuatnya...

1.   Satukan bhn A uli sehingga sebati dan menjadi doh.Bulat2kan sebesar bola golf.ketepikan.
       Bila bhn dah menjdi doh ketepikan.Buatlah bebrepa biji dgn adunan yg ada.

2.   Uli pula bhn B  sehingga sebati dan bole dikepal.Jika masih berderai bolelah  ditambah sedikit margerine
      lagi.Awas jgn terlalu byk margerine nnti pastrinya terlalu rapuh dan kurang sedap.Bila bhn B dah sebati
      bulat-bulatkan sebesar bola golf .Buatlah beberapa biji dgn adunan yg ada.

3.   Ambil  bhn A leper-leparkan dan masukan bhn B seperti inti.( Bhn A masukan dlm bhn B).Bulat2kan
      kembali......
      

dan jadilah seperti gambar disebelah

4.  Dgn menggunakan penggelak.. leperkan adunan seperti ini..... 


5.  Kemudian gulung seperti ini  seperti membuat kuih dadar

6.    Gelek kembali dgn pencanai seperti ini


7.   Gulung kembali......seperti ini....


8.   Bila dah gulung akan jadi seperti ini

9.    Kemudian potong dgn pisau kpd 3 bahagian

10.   Maka akan terbentuklah  seperti ini.... Jika diperhatikan ada 2 bahagian... satu yg berwarna putih  doh A dan yg  warna kekuningan tu doh B

11.    Kemudian dgn menggunakan kayu pencanaigelek kembali ..maka jadilah seperti ini.... 

12.     Bolelah diletakan inti ditgh2nya dan di   lipat 2

13.   Setelah dilipat dua bolelah dikelim bahagian tepinya...... 

14.  Telah pun  siap hanya menunggu utk digoreng. bole juga disimpan dlm pastik beg dan disimpan didlm peti sejuk dingin beku... 

15.   Setelah digoreng...masih panas lagi
        hanya tunggu utk di ngap sajer....
        " karipap panas..karipap panas" 


" selamat mencuba"

Rujukan:http://secuitrasaumiejazz.blogspot.com/2012/03/karipap-pusing-aka-putar.html?m=1